Old World Knowledge is the brainchild of Lori Thomas, Jocelyne Martin, and Christopher Church. Together we hope to revive skills and understanding that used to be common knowledge but has been lost in modern life. We will cover topics that interest us, and we hope will interest you too. We'll cover how to grow and prepare certain foods from scratch, how to build and make things, and how to do things that have become mysterious to most of people. We’ll do this by sharing what we’ve learned since moving to rural Prince Edward Island, Canada, and what we will continue to learn on our journey to self-sufficiency. Taking the mystery out of this lost knowledge and applying a modern approach, we hope to learn how things used to be done and empower ourselves and others to become more closely connected with our respective lives.

April 28, 2013

April 21, 2013

Bathtub Beer 101 Day #3

It's been another 7 days at this point and now it's time to bottle the beer!  Hooray!


It may be hard to tell from this picture but the beer has cleared up quite a lot, you can almost see through the carboy and look at the color.  It looks really good.


Do you see the sediment on the bottom?   That is sediment that will not go into your beer bottles and that my friends is a good thing.


At this point you will want to make a simple syrup with one cup of water and two cups of dextrose (corn sugar),  no need to stir just heat until sugar is dissolved.  Take the water and sugar mixture off the heat and let it cool to room temperature.  In the meantime, you'll want to get the bottles and equipment sterilized.


No, I do not use my bathtub to sterilize the bottles.  I use the kitchen sink, but the process for sanitizing your work area is the same as with your bathtub!  Clean, clean, clean!  Also, I use the same solution of Aseptox and water (1 Tbsp to 1 gallon of water) to sterilize the bottles as with the equipment.  I sterilize 12 bottles at a time as that is what will fit comfortably in one compartment of a two compartment sink.  First I rinse the bottles out to get rid of any dust or bugs that may have crawled in while in storage.  It helps if you rinse your bottles before storage, it makes this process a lot easier than having to get a bottle brush to scrub out your bottles because they are full of mold from not rinsing them prior to storage. 

 Depending on what type of bottles you are using, ( I use 341ml to 355ml bottles) you will probably need to sterilize about 66 bottles.  Remember,  the bigger the bottle, the longer it will take to carbonate.


I let the Aseptox and water solution sit in the bottles for about 15-20 minutes, then I transfer that solution into the 12 waiting rinsed out bottles and then I rinse the sterilized bottles out really well and turn them upside down in the clean and sterilized dish rack (as shown above.)


The other equipment you will need for this step is:  a primary fermenter, a siphoning tube, and a really big spoon. And, yes, the clean and sterilized bathtub to clean and sterilize your equipment!


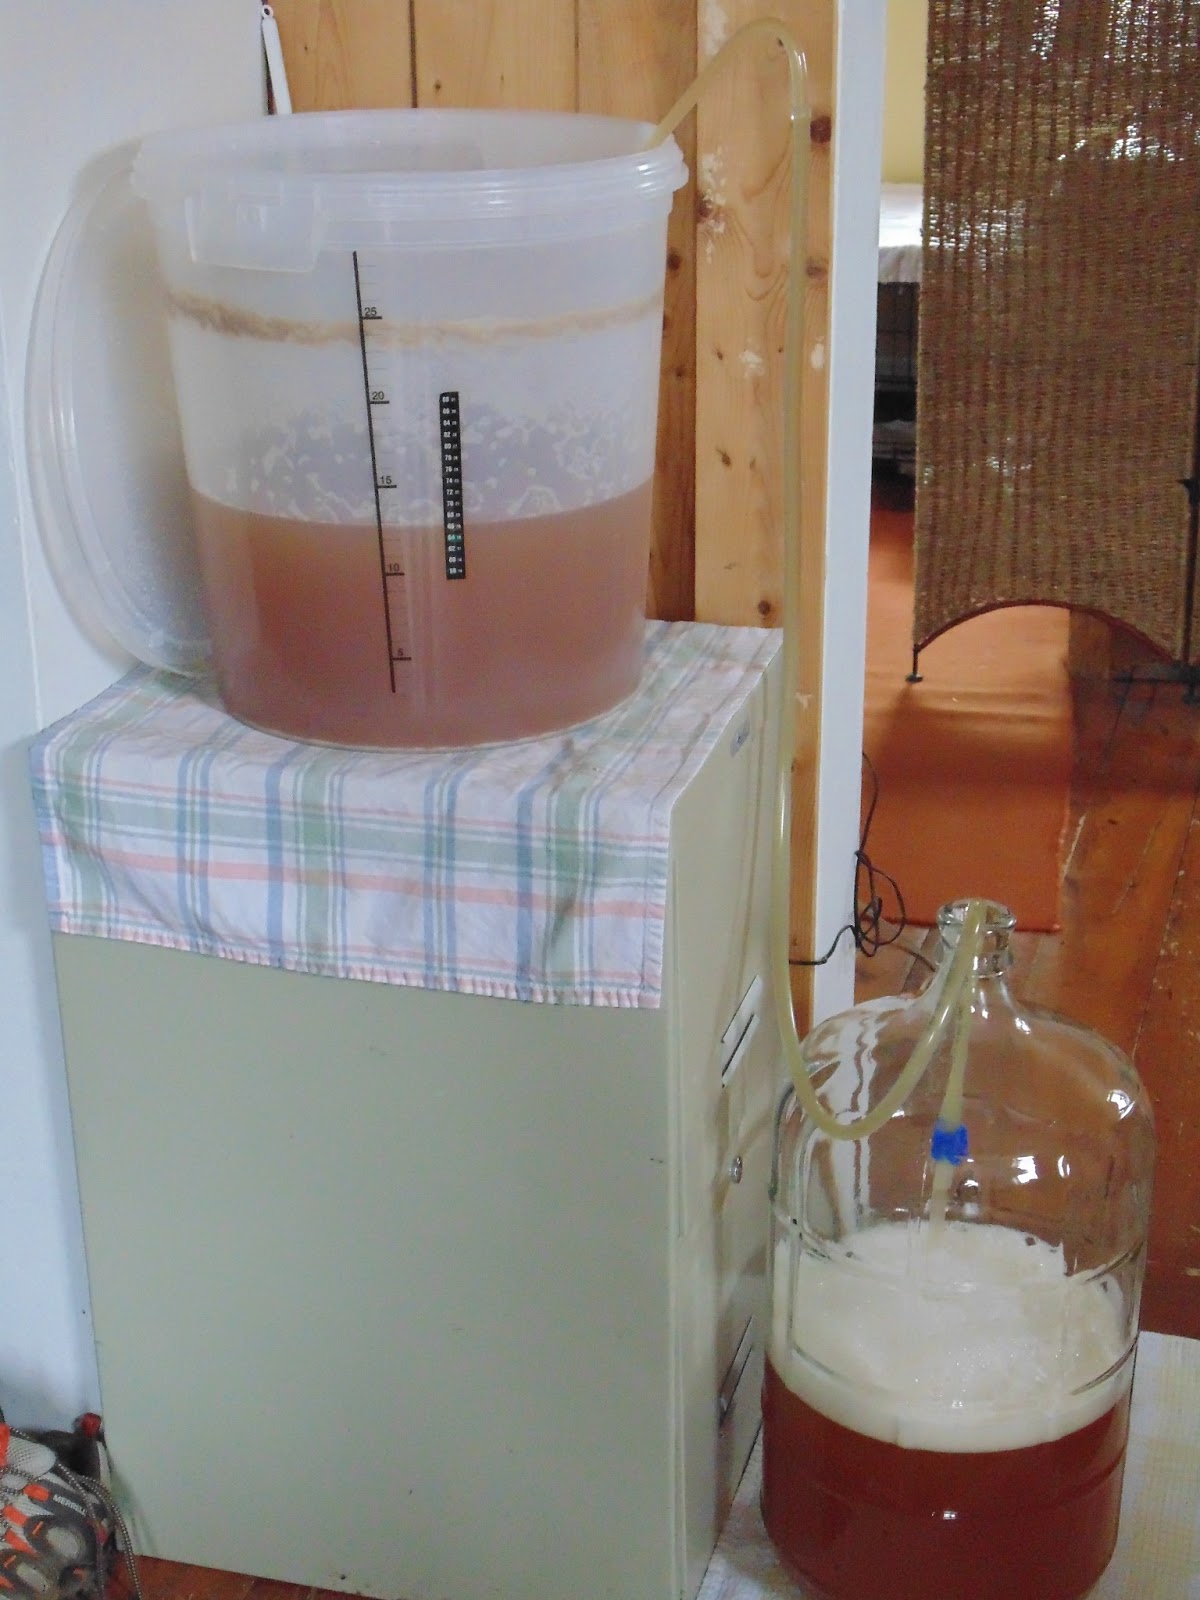
Once your equipment is cleaned, sterilized, and rinsed out, it's time to transfer the beer back into your primary fermenter.  


Try using a clothes pin (as shown above) to keep the siphoning tube above the sediment when siphoning the beer from the carboy.


It is important to leave all the sediment behind if you are wanting a clear beer.  What's left behind, as in the picture above, will simply go down the drain with the rinse water.


Remember the simple syrup you made and left to cool at room temperature?  Add it to the beer that has been transferred into the primary fermenter and give it a gentle but thorough stir.  Set the primary fermenter on a stable surface about 2-3 feet off the ground, like in the picture shown above, with the 66 cleaned and sterilized beer bottles below on the floor.  You are now ready to bottle your beer.


Using the siphoning tube, fill the bottles to within an inch of the top of the bottle.  It may foam up a bit and this is normal, just go back a little later after the foam reduces and add more beer to the bottle.


Close up shot!


When all your bottles are filled, you will need to cap them.  There are all kinds of different cappers available and some you can rent.  I like this one, it's light weight, easy to use, and costs about $50.  As you can see in the picture above, it has a magnetic holder for the cap.


With this model you want to place the adjustable arm about a quarter of an inch above the top of the bottle.  That makes it easier to cap the bottle.  Just press down on the arm until the cap is secured.


Et voilĂ !  One capped beer bottle.  Just 65 more to go.


Alright, once you are done with capping, store the beer in a warm, dark place for two weeks.  Note, sunshine and light are not a beer's friends.  After the two weeks are up your beer will be ready for drinking.  Serve chilled with a twist of lime. Yummy!  Remember beer like wine will improve with age but who wants to wait that long?  Especially since it's taken a month to produced this lovely beverage.
Please drink responsibly.

April 18, 2013

Bathtub Beer 101 Day #2

April 14th, 2013

It's been 7 days and now it's time for the second step.  Most kit instructions will tell you that it's time to bottle the beer by sterilizing your bottles and adding 1/2 tsp. of dextrose to each bottle before adding the beer to the bottle and then capping the bottle after you've filled it.  However, I like to add an extra step to this process to ensure a nice crisp clean beer.


First, you have to sterilize your bathtub just like you did on day one.  Then, you want to clean and sterilize all the equipment that you will need for this next step. 


Remember this stuff?  1 Tbsp per gallon of water to sterilize the equipment.


For step two you will need a carboy (glass or plastic), an airlock, and a siphoning tube.


If you are using a glass carboy be very careful because if you drop it in the tub it could break and that's a little scary.  In the 20 years I've been doing this I've only broke one carboy (knock on wood).  Again, with the carboy you want to sterilize all sides, so rotate the carboy every 15 - 20 minutes.


Sterilize the top end, too!  As in the picture above, I have the carboy flipped over in a container big enough to support the carboy without falling over.


The yeast at this point has done it's job, the beer must is not foaming or bubbling anymore but it is still very cloudy and that's why I do the second step.  We're going to clear this baby up!


After the equipment is cleaned, sterilized, and rinsed out really well, it's time to start transferring the beer from the primary fermenter to the carboy.  In our house this is a family affair.


This process should only take about 20 minutes.  Try to siphon as much beer as possible without disturbing the sediment on the bottom of the primary fermenter.


Once you are done transferring the beer to the carboy, place the carboy about 3 feet off the ground, like in the picture above.  Do not top up the carboy with water (it's not necessary) just put an airlock filled half way with water on the top of your carboy.

Okay, that's it for day two of Bathtub Beer 101.  The beer will clear up considerably in the next 7 days and at that time we will bottle the beer.

April 9, 2013

Bathtub Beer Making 101

Why Should You Make Beer My Way?

I like to make beer from a beer kit, however, I do things differently. If you have made beer from a kit and have been disappointed by the cloudiness, taste, or sediment in the bottom of the bottle, I encourage you to toss out the instructions and try my method. 

I have been making beer this way for over 20 years and always have excellent results. This method will yield clear, crisp, and tasty beer!


What could be more ancient than beer making?  7000 years of history in the production of beer and one of the oldest beverages known to mankind.

When I tell people that I make beer in my bathtub, they look at me in a strange way and it's no wonder. I don't actually make beer in my bathtub, I merely sterilize the equipment in the tub.  I do this because I don't have a laundry sink in my home and I need a big vessel in which to splash around a lot of water and not have to worry about making a mess.


Day #1 of Bathtub Beer Making 101 (Sunday, April 07, 2013)

First, I sterilize the bathtub with Comet and a scrubby. Then rinse out of tub really well.  I can not stress enough about keeping everything that comes in contact with the beer clean, including yourself.  Wash your hands often and wear clean clothes.


Next, I clean and rinse all the equipment that I'm going to use for starting the beer.  Then, I sterilize the equipment with Aseptox and water as per instructions on the picture above (ie. 1 Tbsp per gal of water).


Stir the aseptox and water solution.


Because I use only one gallon of water and Aseptox solution, I tilt and rotate the primary fermenter bucket so the solution will reach all the sides. Note that I have another smaller bucket underneath the bigger bucket so that the solution doesn't drain out.  I also keep the solution in place for 15-20 minutes per side (ie: 4 sides = approximately 1 hour of time to sterilize the entire fermenter).


Today, I am using a beer kit ( see picture above.)  One day I plan to try making beer from scratch.  There is a grain elevator in Georgetown, PEI where I can get barley and other grains and I have a friend that grows cascade hops in his backyard. I hope to be able to use these products and make beer from scratch when I have a little more time.  

When it comes right down to it, a beer kit only cuts out a couple of steps from the beer making process and it's cheap and easy to do.  This beer kit cost me around $20 and another $4 for the dextrose, $1.60 for the caps and I already had the bottles from previous beer purchases.  So, for an investment of under $30, I will get 5 and a half dozen beers which works out to be around .38 cents per beer.  WOW!


Now you need to heat up the can (barley goop --- clearly not the technical term) in hot water for around 10 minutes.  This will make it easier to pour later.


Get your sugar ready.  I use one kilo plus one cup, I like my beer a little stronger.  I have never actually taken the specific gravity of the must prior to fermentation so I don't know what the alcohol content is, I just know that this amount seems to work well.


Boil 3 and a half litres of water in a pot.  Now, you want to open and pour your warmed up can of barley goop into your sterilized primary bucket, add the boiled water, and stir well.  Add the dextrose and stir again to dissolve the sugar.


Top up your primary fermenter with cool water to the 23 litre mark and stir mixture really well.  Make sure the temperature is no higher than 24 degrees Celcius before adding the yeast.


Add the yeast.


The yeast should be evenly distributed on top of the solution.


Give it a gentle stir.


Put a cleaned and sterilized lid on the primary fermenter.


Keep the primary fermenter of beer in a warm place for 7 days.  This concludes 
Day #1 of Bathtub Beer Making 101. Stay tuned for Day # 2 on Sunday April 14th. 

April 7, 2013

What is Old World Knowledge


Old World Knowledge is the brainchild of Lori Thomas, Jocelyne Martin, and Christopher Church. Together we hope to revive skills and understanding that used to be common knowledge but has been lost in modern life.

We will cover topics that interest us, and we hope will interest you too. We'll cover how to grow and prepare certain foods from scratch, how to build and make things, and how to do things that have become mysterious to most of people.

We’ll do this by sharing what we’ve learned since moving to rural Prince Edward Island, Canada, and what we will continue to learn on our journey to self-sufficiency. Taking the mystery out of this lost knowledge and applying a modern approach, we hope to learn how things used to be done and empower ourselves and others to become more closely connected with our respective lives.