It's been 7 days and now it's time for the second step. Most kit instructions will tell you that it's time to bottle the beer by sterilizing your bottles and adding 1/2 tsp. of dextrose to each bottle before adding the beer to the bottle and then capping the bottle after you've filled it. However, I like to add an extra step to this process to ensure a nice crisp clean beer.

First, you have to sterilize your bathtub just like you did on day one. Then, you want to clean and sterilize all the equipment that you will need for this next step.

Remember this stuff? 1 Tbsp per gallon of water to sterilize the equipment.

For step two you will need a carboy (glass or plastic), an airlock, and a siphoning tube.

If you are using a glass carboy be very careful because if you drop it in the tub it could break and that's a little scary. In the 20 years I've been doing this I've only broke one carboy (knock on wood). Again, with the carboy you want to sterilize all sides, so rotate the carboy every 15 - 20 minutes.

Sterilize the top end, too! As in the picture above, I have the carboy flipped over in a container big enough to support the carboy without falling over.

The yeast at this point has done it's job, the beer must is not foaming or bubbling anymore but it is still very cloudy and that's why I do the second step. We're going to clear this baby up!

After the equipment is cleaned, sterilized, and rinsed out really well, it's time to start transferring the beer from the primary fermenter to the carboy. In our house this is a family affair.
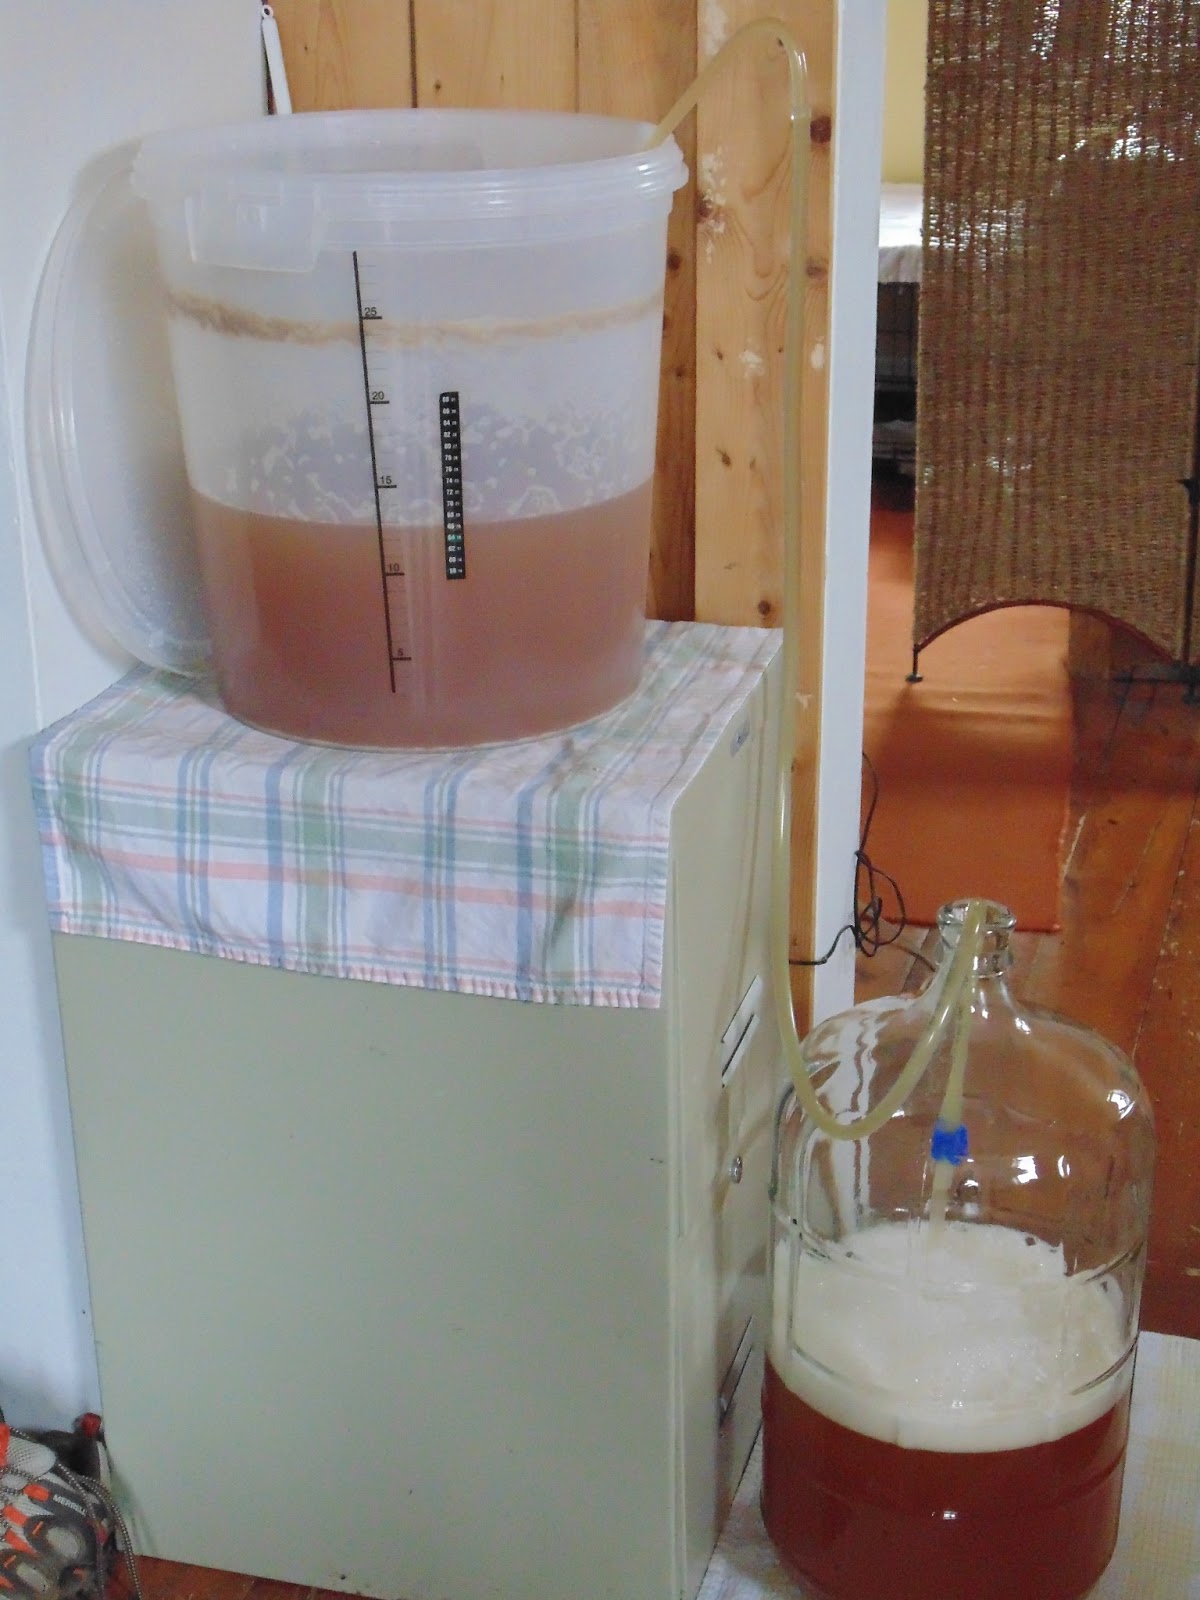
This process should only take about 20 minutes. Try to siphon as much beer as possible without disturbing the sediment on the bottom of the primary fermenter.

Once you are done transferring the beer to the carboy, place the carboy about 3 feet off the ground, like in the picture above. Do not top up the carboy with water (it's not necessary) just put an airlock filled half way with water on the top of your carboy.
Okay, that's it for day two of Bathtub Beer 101. The beer will clear up considerably in the next 7 days and at that time we will bottle the beer.
Was disappointed by the title not actually matching the description, in my opinion. When I was a kid in the early 1970s I knew a Bruton Snuff dipping older lady from the Southern states whom actually made home brewed beer in her bathtub. Was hoping to see exactly how she did that,out of curiosity, on this site but again, was disappointed. :she had told me it was an old family recipe dating back generations.
ReplyDelete